Investing & Retirement Tools
Calculators, apps and other tools can help us manage our finances and plan our future. I’ve created this directory of tools to help you find ones that can help you in your specific circumstances.
For context, here are some of the tools I regularly use or have used in the past and found to be worth the money, time and effort:
- Boldin: I use this tool for my own retirement planning.
- Stock Rover: I’ve started to use Stock Rover to evaluate my investment portfolio and research stocks and ETFs.
- Empower: I’ve used Empower for over 10 years to track my investment portfolio, evaluate fees and plan retirement.
- Fidelity: Particularly for those in retirement with a need to manage distributions, Fidelity is an excellent choice.
- Schwab: Next to Fidelity, Schwab is an excellent option, too, although I prefer Fidelity’s website and apps.
- Capitalize: This free tool will help you step-by-step with a 401(k) rollover. I’ve used it and love it.
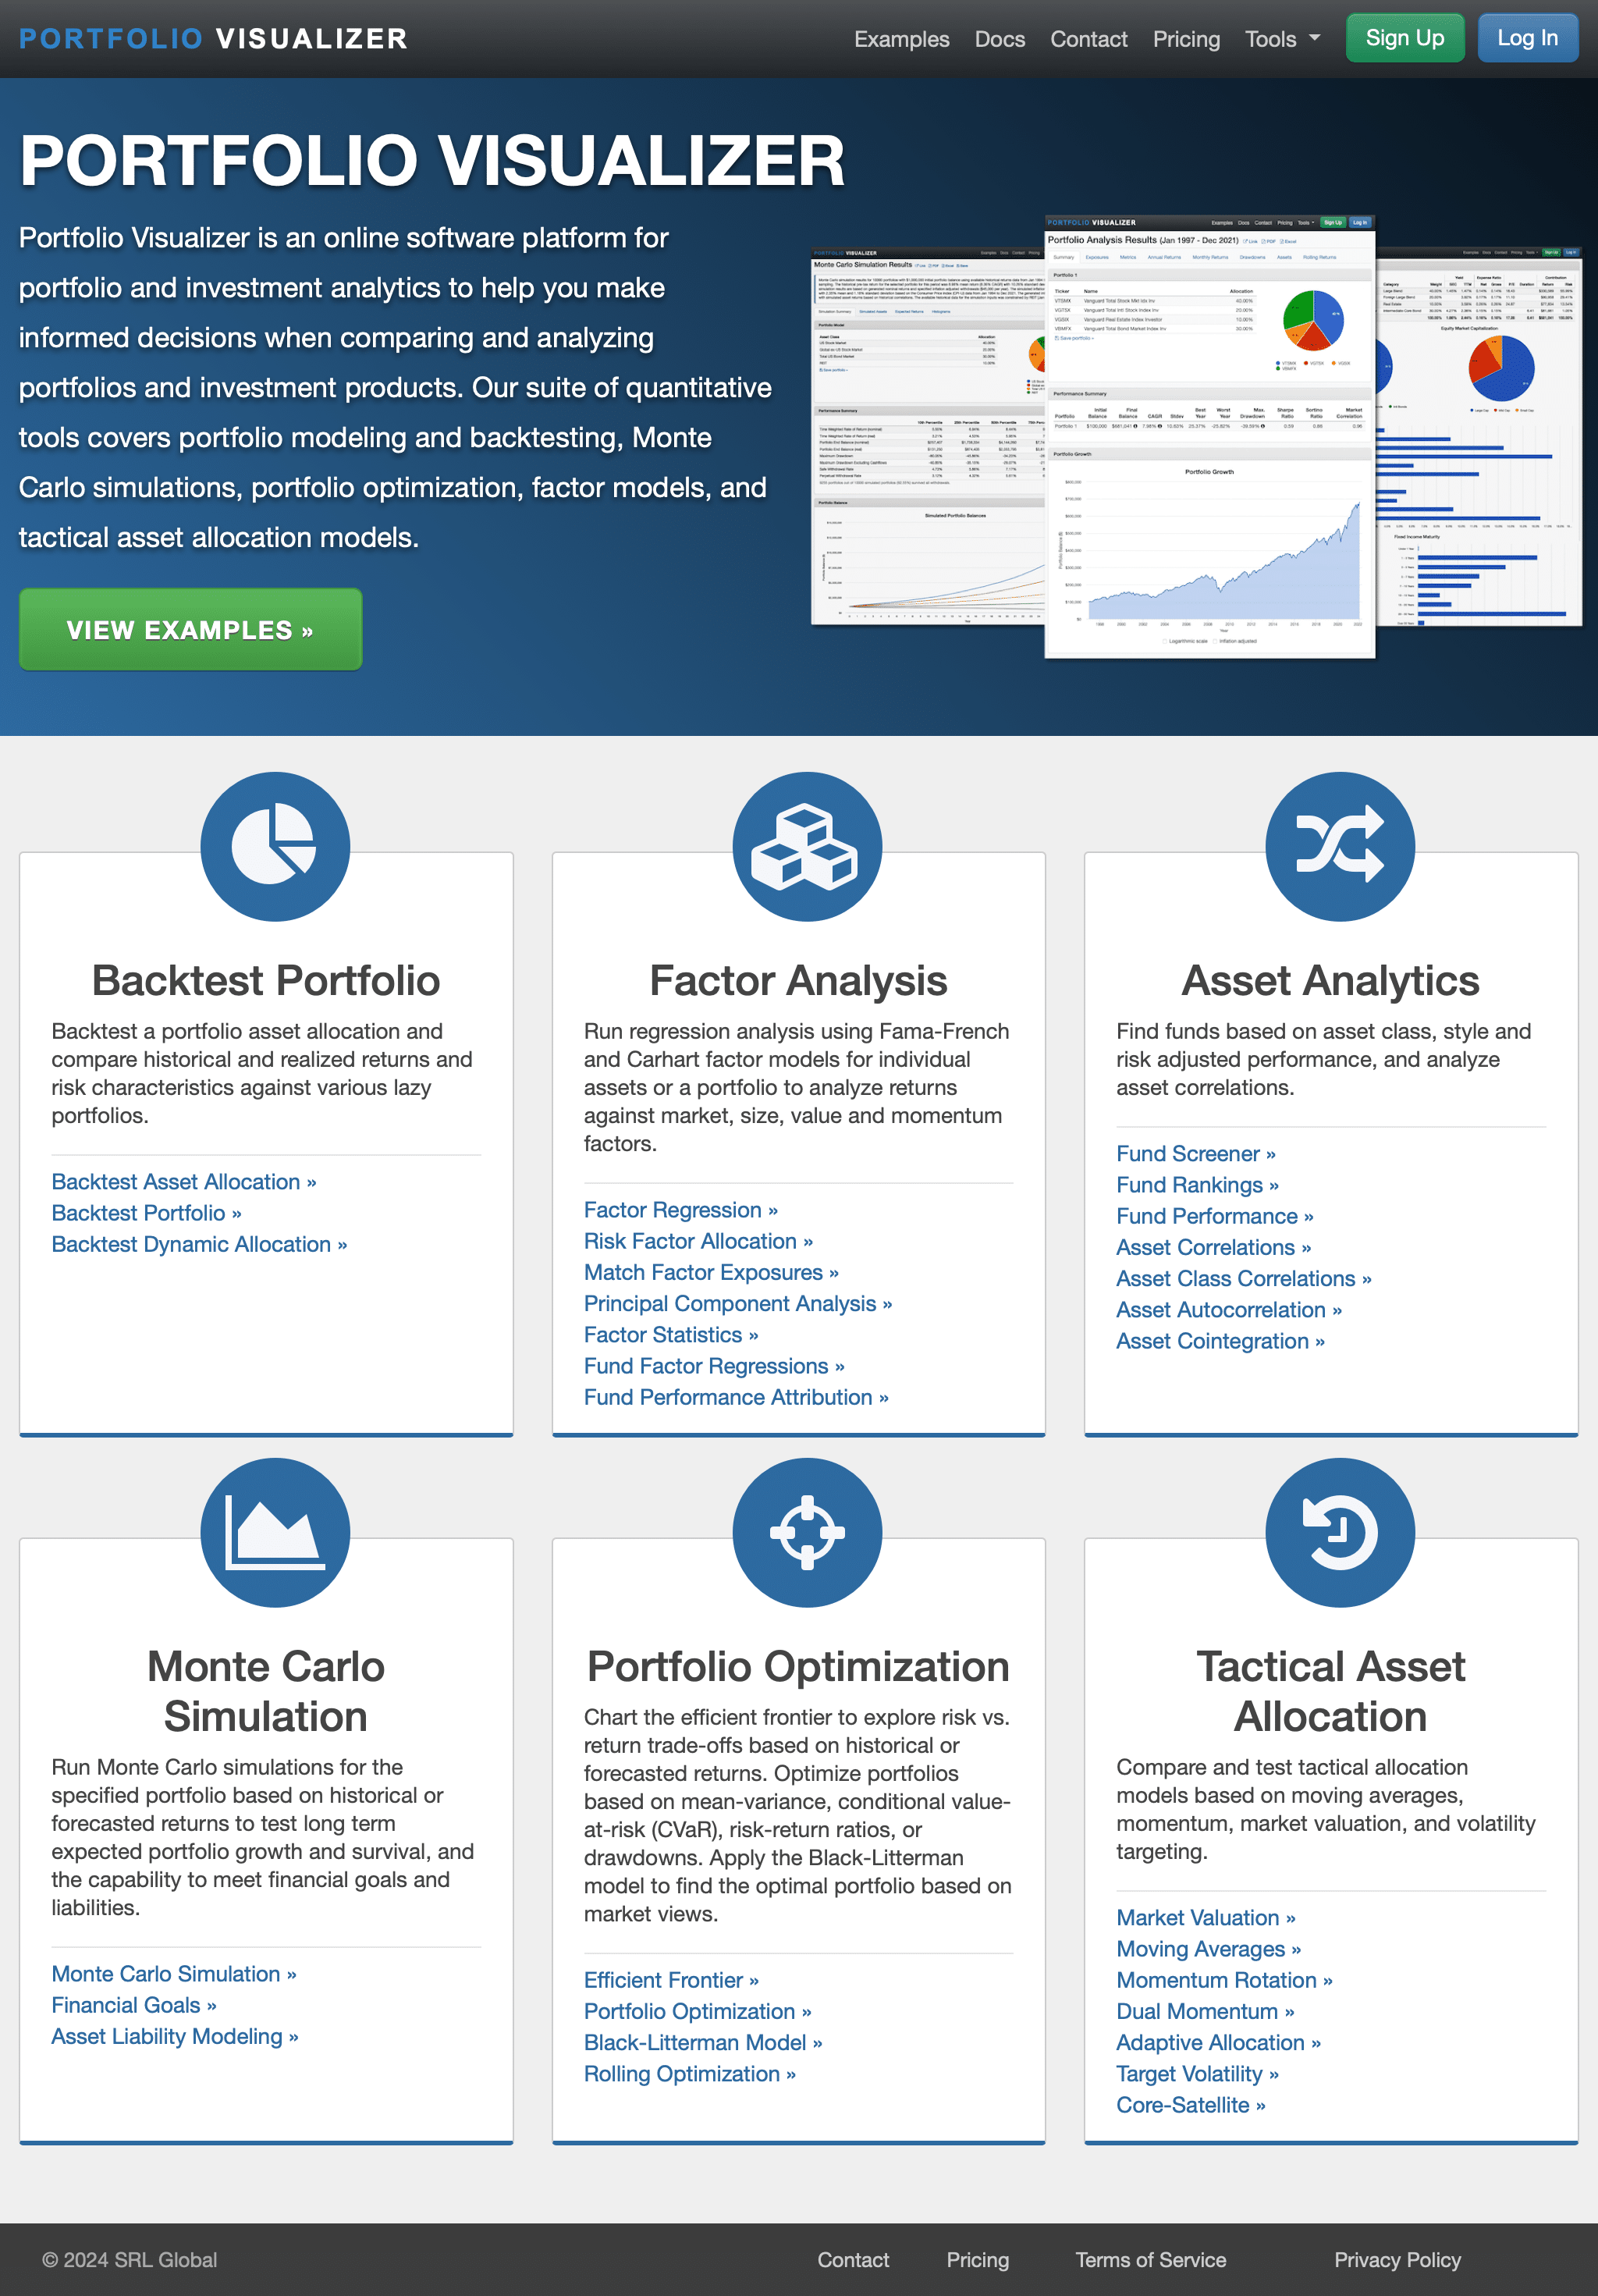
- Portfolio Visualizer: This free tool is great for comparing historical returns and volatility of investment portfolios, among other things.
- Monarch Money: I’ve used a lot of budgeting tools over the years. I have several favorites, which include Empower for expense tracking and Rocket Money for budgeting. My current favorite all-around budgeting tool, however, is Monarch.


1-41 of 41 results